Your child is perfect, we only have to straighten his little feet.
GOOD TO KNOW BEFORE THE TREATMENT?
For sure there is plenty of information coming to you from all sides. It is good to order these pieces of information – this helps to properly plan the treatment, starting with meritorical preparation to it. This is important because it brings a lot of calmness: you can consciously choose the right doctor and medical centre, and if any errors happen – you can intervene promptly.
GOAL OF TREATMENT
WHEN TO START?
ADDITIONAL EXAMINATIONS?
3 STAGES
The Ponseti method consists of 3 stages. The first two are dependent on the doctor and he/she is the one responsible for their correctness. The third stage, started and occasionally monitored by the doctor, is dependent only on you. This stage is crucial for the correct treatment.
1. CASTING
2. TENOTOMY
3. FOOT ABDUCTION BRACE
It is important to know each of these stages – to be able to consciously and actively take part in it. This is essential because each stage might be modified in very many ways reaching far beyond the standards of the Ponseti method. It may be difficult and time-consuming to correct the mistakes introduced by these modifications. It may also be expensive.
1. GIPSOWANIE
WHO APPLIES THE PLASTER CASTS?
The plaster casts are put on only by a qualified orthopedist well knowing the Ponseti method and by their assistant – plaster cast technician. Nobody else should be doing this. Also you actively take part in this stage: you hold the child so that it does not move too much, but most of all, you distract the child’s attention away, soothe the child and provide sense of security.
DOES THE CHILD FEEL PAIN?
The phase of casting should continue gradually, slowly and very gently. Absolutely, the child should feel no pain! However, the baby may be annoyed that someone manipulates their feet, keeping them still or putting on a plaster cast, which may be warm untill it dries. Then, it cools down and becomes cold.
REDRESSIONS BEFORE APPLICATION OF THE PLASTER CAST
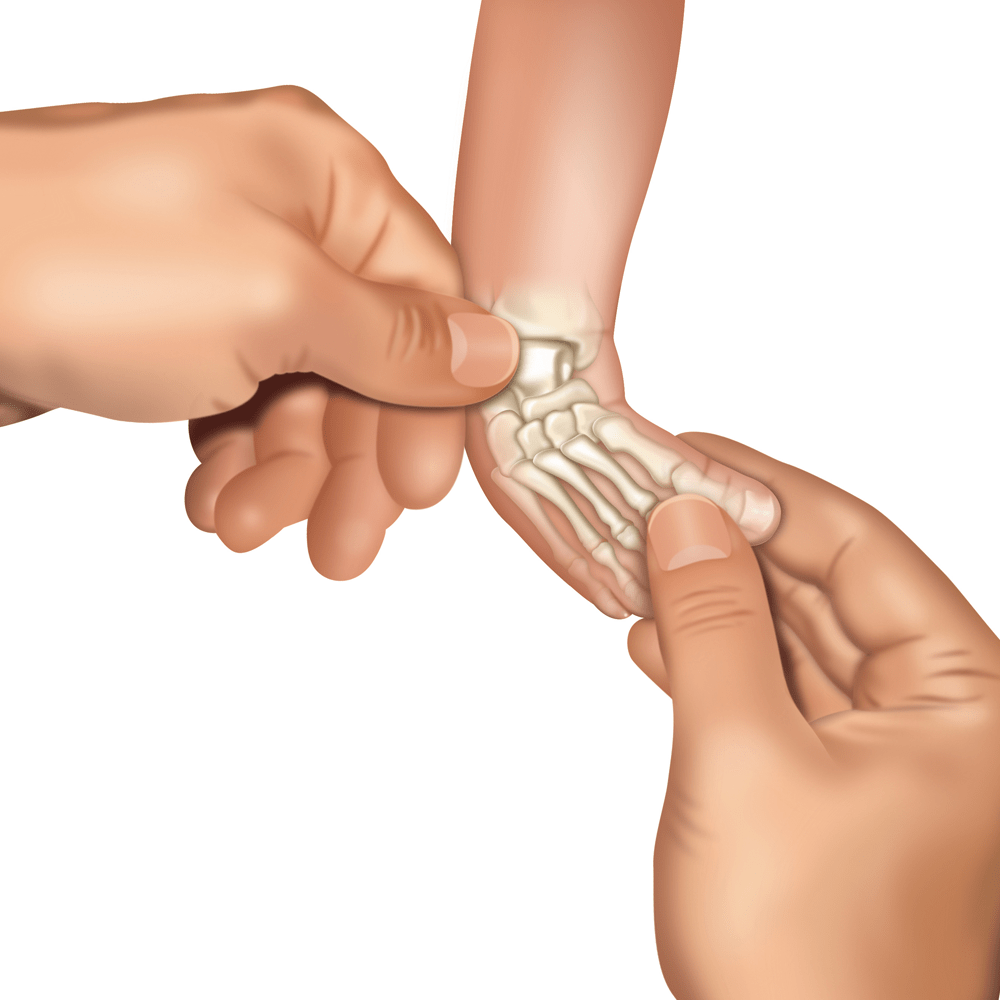
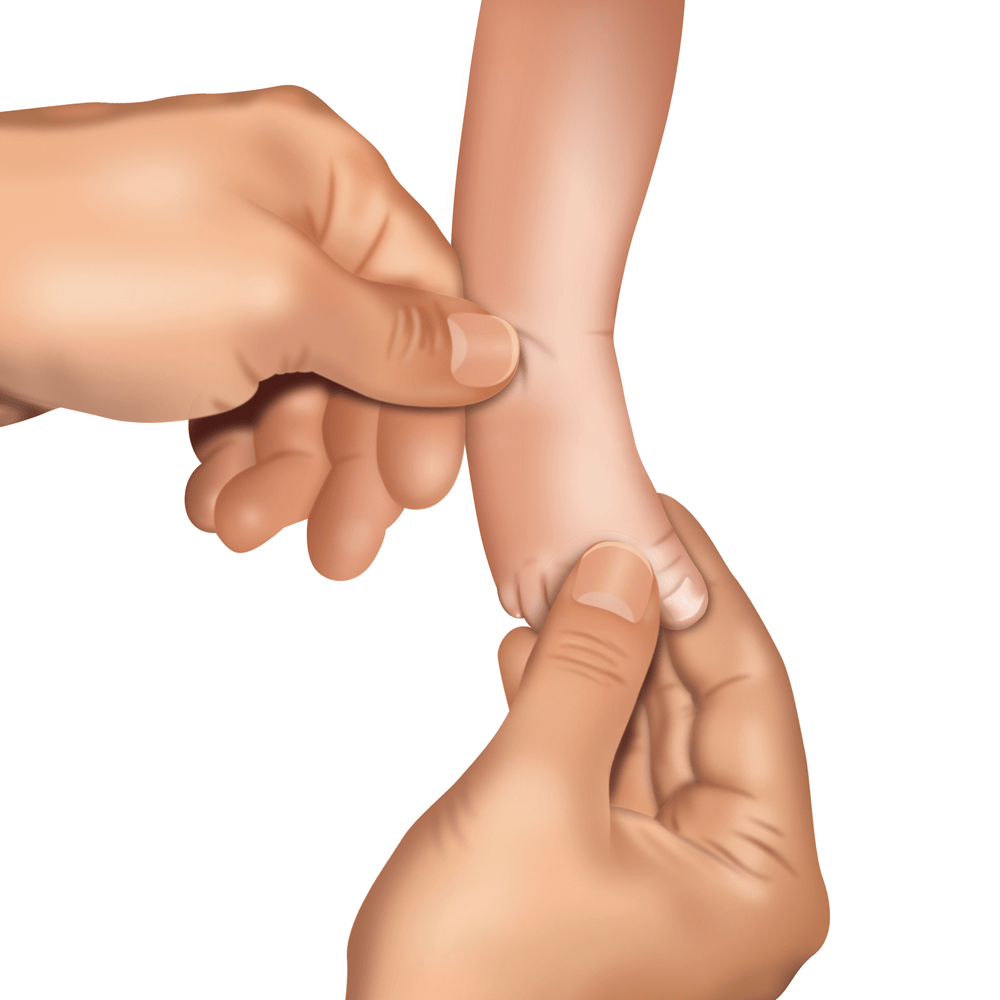
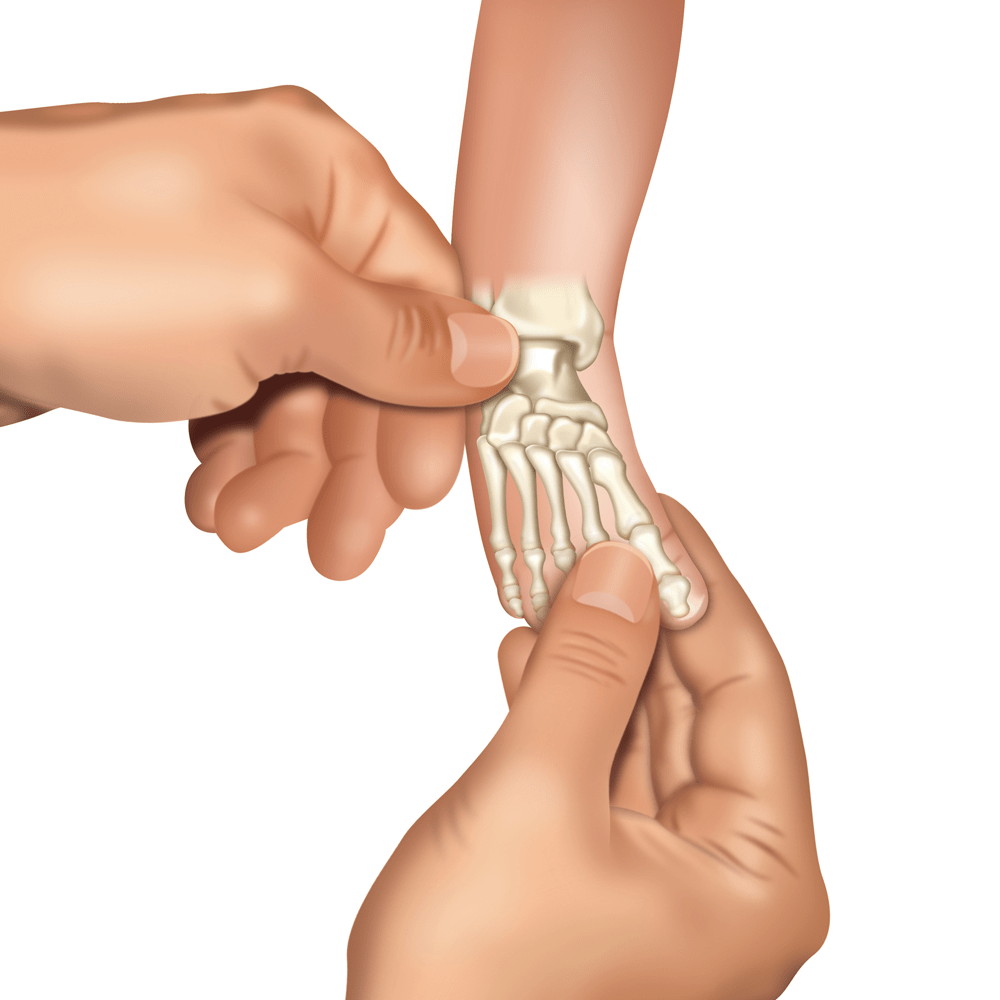
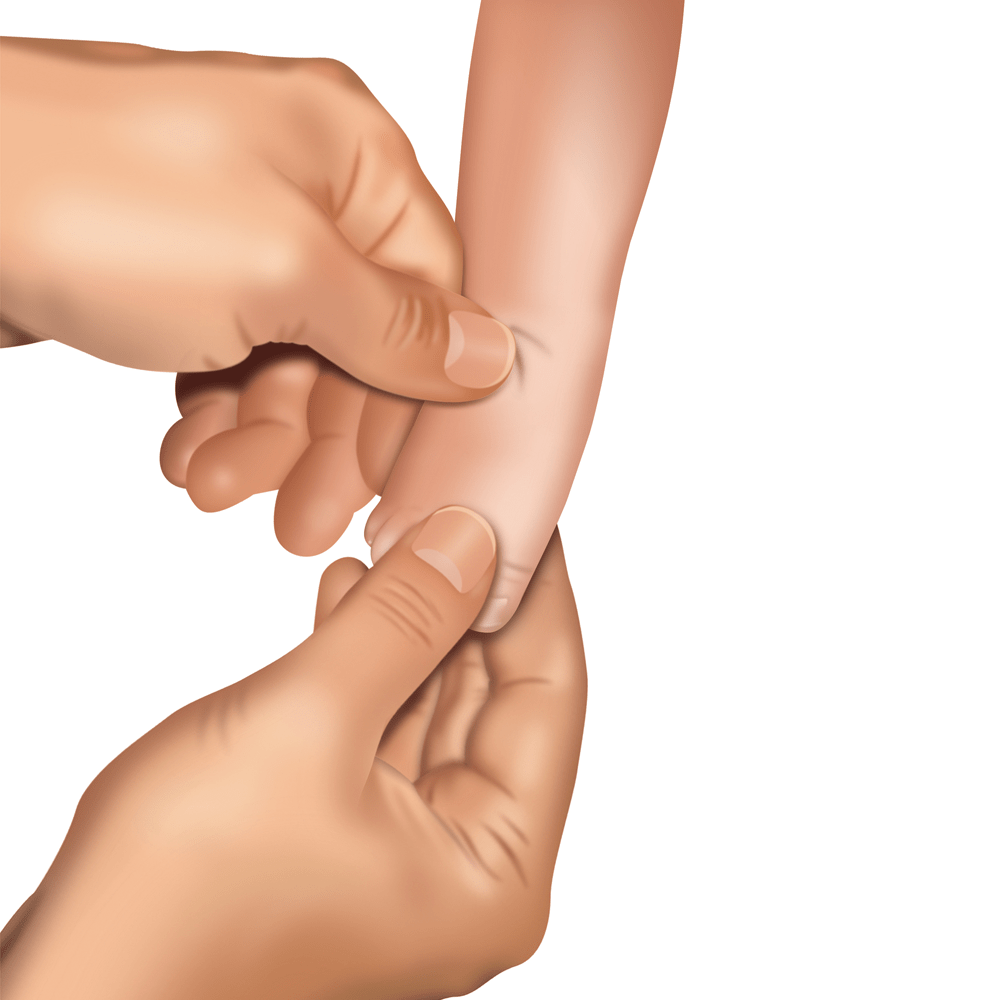
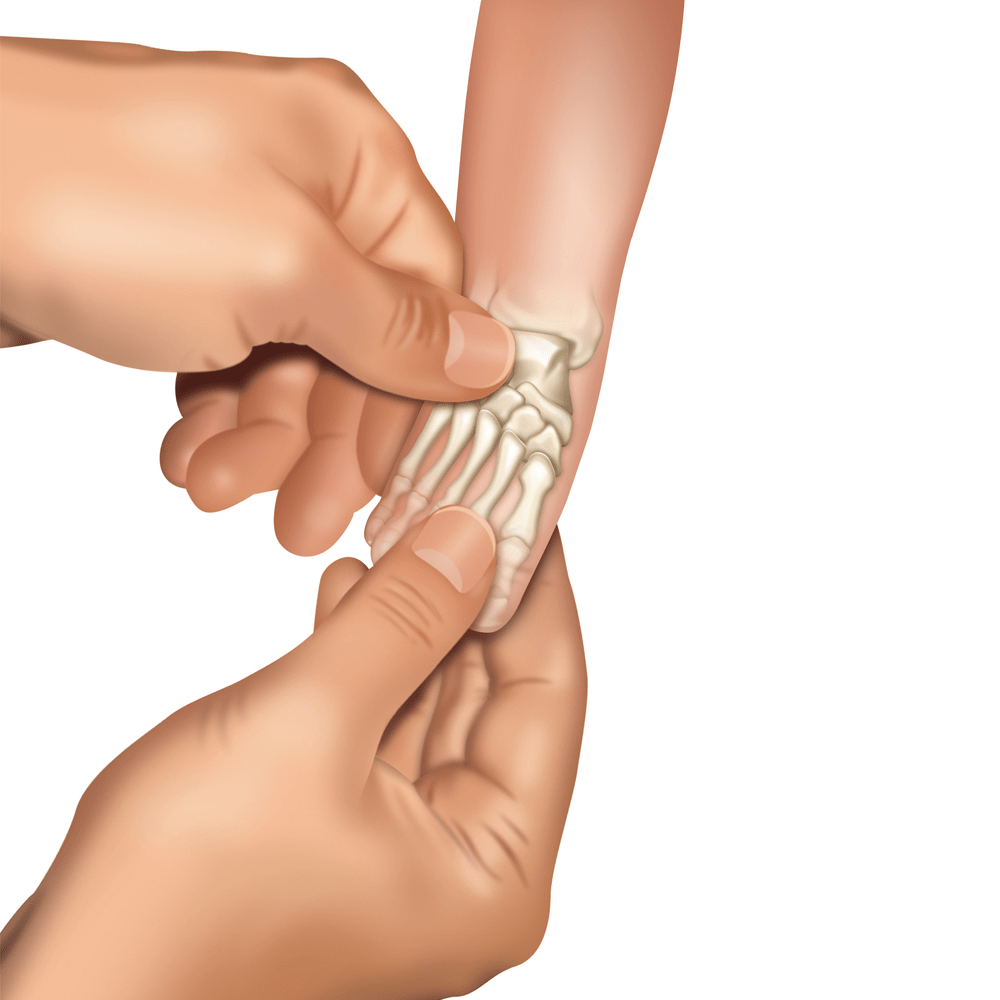
Doctor, sitting (less often: standing) opposite the lying baby, before putting the plaster cast on, performs a series of manipulations (redressions).
Redression is a gentle and thought-out stretching of the inner structures of the foot. After each movement, the foot returns to the starting position and a small pause follows to relax the muscles, ligaments and tendons. Then, the move is repeated. Each manipulation is a bit different so that the foot is more and more rotated outwards and upwards (as far as it is possible). After a few redression movements the foot is ready for putting the plaster cast on and consolidate the correction obtained with redressing.
* redressions of the clubfoot: Visual Science Media. All rights reserved.
NOT FORCING!
NECESSARY SMALL SURGICAL INTERVENTION

HOW PLASTER CAST APPLICATION WORKS?
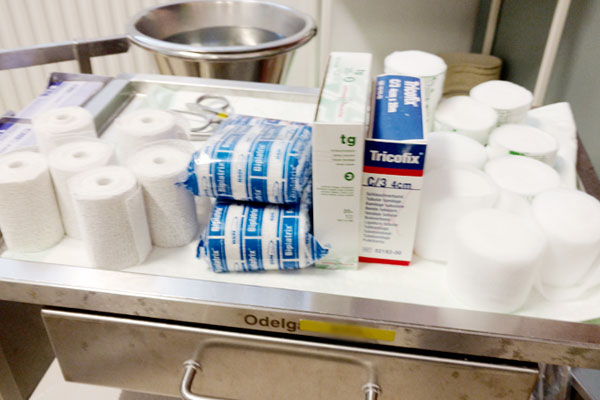
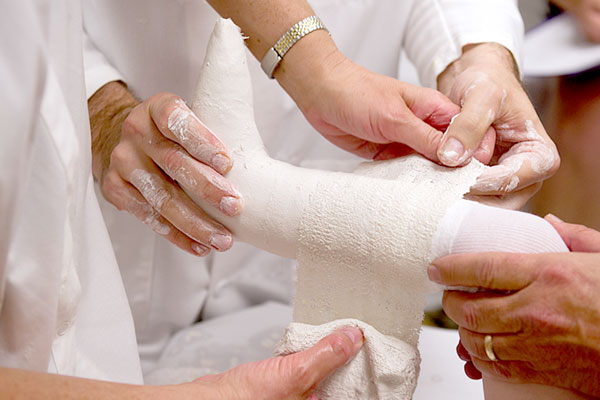
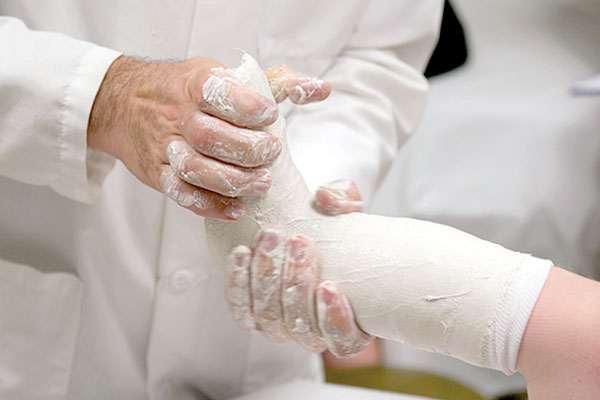
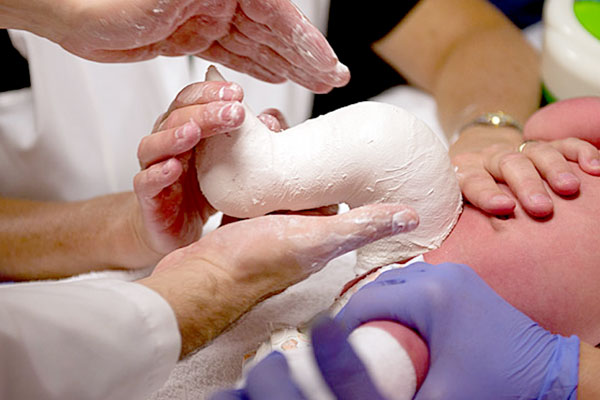
Firstly, the cast technician puts a special cotton tube (tubulair or stockinette) on the child’s leg and/or wraps the leg with a special thin undercast padding in a roll . Then he/she starts to apply the plaster cast in a roll, starting at the toes. In the meantime, the doctor holds the clubfoot and places it in the appropriate position, molding and modelling the cast in the area of the correction until the foot stabilizes there.
The plaster cast covers the whole leg: from toes to groin (long leg cast). The knee must be bent at an angle of 90° (or 110°-120° in the case of ATYPICAL OR COMPLEX CLUBFOOT).
Such a plaster cast (long cast + bent knee) allows to immobilize the clubfoot in the right position: this prevents the talus from rotating back into its pathological position. Also, the soft structures (ligaments, tendons, tissues) are maximally, equally and slowly stretched. During such correction, joint surfaces change shape, adapting the new, proper position. Additionally, with the leg positioned this way, the cast will not slip off.


WHAT ARE THE FEATURES OF A WELL APPLIED PLASTER CAST?
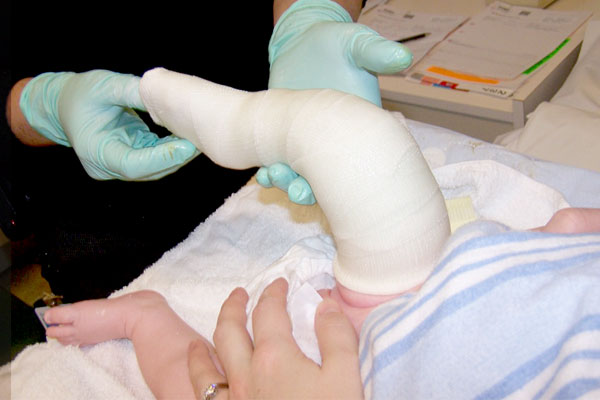
First of all, the cast as material used in the Ponseti method is a standard white gypsum – Plaster of Paris (not synthetic, etc.) based on calcium sulphate, i.e. gypsum you may have encountered in your life. This is due to the fact that such traditional gypsum is really good to modelling and therefore the look and shape of the plaster cast is important. A well applied plaster cast is ideally modelled, especially in the ankle, heel and the foot in general. Moreover, each subsequent plaster cast should be put on in a different position, bringing the clubfoot closer to its natural look.
The plaster cast should provide enough space for the toes – they have to be clearly visible – side by side – from big toe to the pinky toe (“never hide the pinky toe”), evenly placed on the plaster cast platform under toes, can’t be pressed (neither on the width nor on the high), can’t be curled downward, over stretched upward. The toes must also not reach outside the plaster cast. This causes numerous complications (for example, contractures), which could have been avoided. Near the groin the plaster cast is slightly wider. Its edge should be properly secured not to irritate the child’s skin and to prevent the plaster on the edge from cracking (thus, it is a good idea to use a cotton tubular before plaster cast application, and afterwards roll the end of the stockinette up onto the plaster cast). There is a bit more plaster around the knee (especially when the children start to crawl) and on the heel. Sometimes the standard white plaster casts is covered with synthetic cast (Soft Cast or Scotch Cast) to prevent the plaster cast from crumbling, cracking or wearing off. This solution is provided for more active children – these who already crawl, try to stand or walk. The plaster cast should not be very thick, heavy and unshaped. Unfortunately, this would mean that the doctor and cast technician are not really familiar with casting according to the Ponseti method. Learn more from our blog article about THE SHAPE OF THE CAST.
HYGIENE DURING PLASTER CAST APPLICATION
When the plaster cast is put on, the sensitive parts of the child’s body (usually genitals) should be secured with a piece of cloth (tetras diaper works well). This is because the baby’s diaper is taken off for the time of casting – it disturbs the process.
After the plaster cast is put on, you should clean the child from the remains of the plaster with damp cotton pads (or tetras diaper) as soon as possible. Drying plaster cast turns into a crust irritating the baby’s sensitive skin. You should clean the toes and the spaces between them. To do this, it is best to use cotton ear buds moistened with warm water. They gently clean the remains of the plaster and dirt in hard-to-reach places. Learn more from our articles about BATHING A CHILD IN A CASTS and TOES HYGIENE IN A CAST.
The toes in plaster cast have to be clearly visible – side by side – from big toe to the pinky toe, can’t be pressed (neither on the width nor on the high), can’t be curled downward, over stretched upward. The doctor should check blood circulation and colour of the toes (when you pinch the toes, they should turn white and then return to pink).
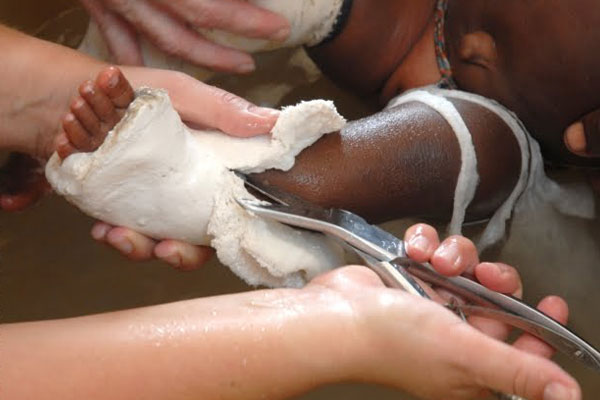
HOW OFTEN ARE THE PLASTER CASTS CHANGED?
To maintain the correction achieved with redressions, the clubfoot is kept in the plaster cast for 5-7 days (most often, for a week). At the time, ligaments and tendons soften, stretch and settle in the new position. After a week the plaster cast is taken off and the foot is again subjected to gentle manipulations, which bring it closer and closer to the appearance of a healthy foot.
Weekly change of the plaster cast is repeated until the foot gains proper correction and partially normal look – metatarsus adductus (forefoot adduction), heel varus, supination and cavus will get completely eliminated.
ERROR!
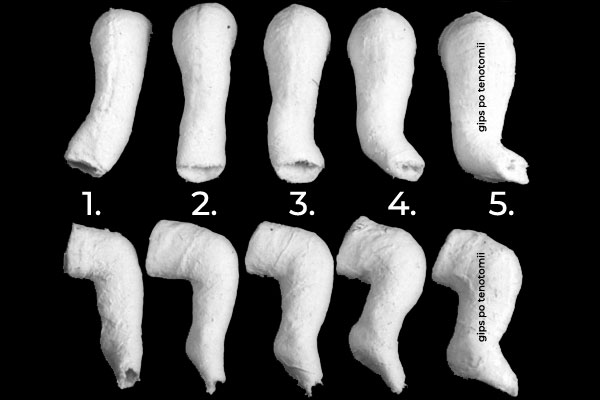
HOW MANY PLASTER CASTS ARE USUALLY NEEDED TO CORRECT THE CLUBFOOT?
Correction is usually achieved with 5-7 plaster casts*. According to Dr. Ponseti, even very stiff feet need no more than 8-10 plaster casts.
*The use of more plaster casts is not advisable: this often leads to secondary deformities. There is also an increased risk of abnormalities in the formation of bone and cartilage cells. Importantly, too little plaster casts are also fatal, as insufficient plaster casts lead to partial correction. It is also often an indication to take a closer look at the subject, in terms of the so-called “quick correction”, during which the doctor wants to fix the foot quickly and radically redresses it, putting on as few casts as possible, while realistically the foot requires more of them due to its stiffness. The results of such a procedure are bad.
When the foot achieves proper correction, the last and component to resolve is the equinus. The doctor then decides about the percutaneous tenotomy of the Achilles tendon (heel cord).
You invite the foot to come back in the normal position. Already, the foot knows what this position is. It was in that position for the first half of pregnancy. The foot was normal until then.
2. TENOTOMY
OF CHILDREN NEED A TENOTOMY
Percutaneous Achilles tendon tenotomy (PAT or tendo-Achilles tenotomy – TAT or heel cord cut) is a relatively simple surgical intervention, needed by as many as 90-95% children with clubfeet. It is very often performed in local anesthesia on an outpatient unit, which means the child does not have to stay in hospital overnight.
In many places in the world, tenotomy is most often performed using EMLA cream as anesthetic. The cream is applied to the back of the foot, to the place of the planned cut. Such prepared foot undergoes tenotomy. Foreign medical centers recommend that the cut is performed in local anesthesia – an injection directly to the tendon right before making the cut (not earlier) or, in some cases, in general anesthesia. If there are anesthesiology facilities on site, then general anesthesia is used more often. The question of anaesthesia should always be discussed with the attending doctor and the anaesthetist.
It is usually performed under local anesthesia on an outpatient ward, which means that the child does not have to stay in the hospital overnight.
This easy surgical procedure takes less than 5 minutes, followed by the final plastering.
Where anesthetic facilities are available, general anesthesia (light anesthesia) is more often used. The issue of anesthesia should always be discussed with the attending physician and an anesthesiologist.
WHY TENOTOMY IS REQUIRED?
Tenotomy is performed because after the series of casts, the calcaneus still has strong plantar flexion due to shortened and very tcontracted Achilles tendon. In contrast to extensible ligaments in the tarsus, the Achilles tendon is built of nonflexible, thick, pressed bundles of collagen with few cells. It means that this tendon may be “stretched” only by cutting. This cut (Achilles tendon tenotomy) corrects the equinus.
DO ALL CHILDREN NEED TENOTOMY?
No, not all children need it. The exceptions are usually the cases of light deformity which is very correctable and does not require many plaster casts. Usually one or two plaster casts are enough to fully correct all components of the deformity, including even the equinus. However, as many as 90-95% of children need tenotomy.
THANKS TO ACHILLES TENDON TENOTOMY,
THE CLUBFOOT ACHIEVS FULL DORSIFLEXION (10-15°),
THE CALCANEUS GOES BACK TO ITS PLACE (DOWNWARDS) AND THE FOOT ACQUIRES NORMAL LOOK
AND FULL FUNCTIONALITY.
WHO IS PRESENT DURING TENOTOMY?
If tenotomy is performed under local anesthesia, there are at least two people present during the intervention: paediatric orthopedic surgeon and assistant (cast technician). It may be that one parent is also present. If tenotomy is performed under general anesthesia, then a whole team of doctors and nurses is present in the operating room and the parents must stay outside.
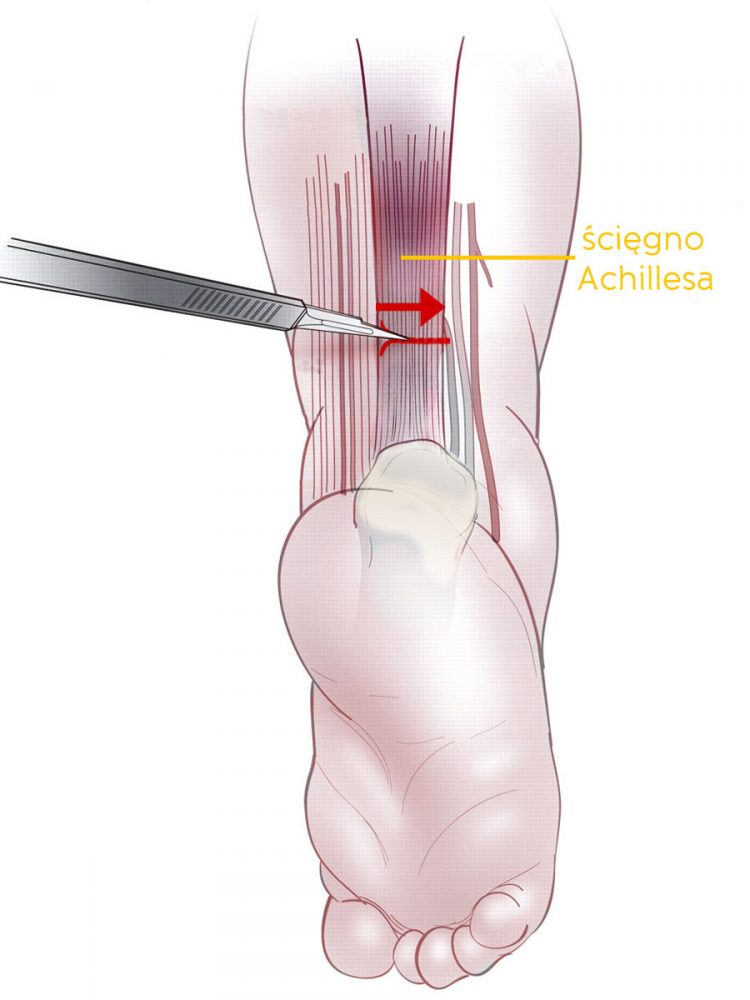
TENOTOMY STEP BY STEP
The child is lying on his/her back. The assistant holds the child’s leg bent at the knee at 90° angle. The doctor, holding the foot in the maximal achievable dorsiflexion and using a very thin scalpel (cataract blade), cuts the skin 1.5-2 cm above the calcaneus. Inserting the scalpel a bit deeper, the doctor cuts the Achilles tendon across, in the direction from the medial to the lateral side of the foot. The cut on the skin is no longer than 3-5 mm and usually does not require stitches. Optionally, the doctor may use one small stitch or a strip bringing the edges of the wound together. When the tendon is cutted, it makes a characteristic cracking sound, similar to cracking of a very tight rubber. After tenotomy, the medical staff put a small dressing on the wound and put on a long-leg plaster cast with the knee bent at 90° (110°-120° for ATYPICAL AND COMPLEX CLUBFEET).
The difference in casting before and after tenotomy is significant.
Directly after tenotomy the doctor puts on the last plaster cast. It is very important and must be made ideally. It also needs to follow specific rules, that is, it needs to be in so-called hypercorrection.
HYPERCORRECTION
Hypercorrection aims at a slight overcorrection of the clubfoot to let the healing tendon regenerate to proper length. After the plaster cast is removed, the foot (or feet) should seem overcorrected, very much abducted (rotated outwards). The appearance of the foot returns back to normal over time, especially when the child starts to walk.
FOR HOW LONG IS THE PLASTER CAST PUT ON THE LEG AFTER TENOTOMY?
As a standard, the plaster cast remains on the leg for three weeks; but older children, who are already more active – start to crawl, sit, stand – stay in the plaster cast for four weeks. Some doctors also make a plaster cast change after tenotomy, usually dividing the above period to 1 week + 2 weeks or 2 weeks + 2 weeks. Such action is recommended only when it is necessary to have a look at the foot during the healing of the tendon, to correct the position of the foot by changing abduction or dorsiflexion.
When the leg is put in the plaster cast after tenotomy, tissue forms between the two ends of the cut Achilles tendon to reattach them. The tendon regenerates into proper length. For this reason, the plaster cast must be applied in hypercorrection and then left without interference.
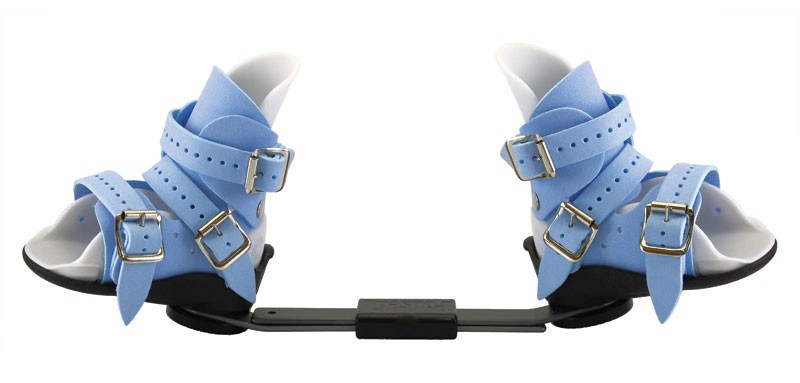
3. FOOT ABDUCTION BRACE
Despite the full correction of the clubfoot, the congenital predispositions, which might have caused the deformity, may still stay active for some time. There is a risk of relapse of the clubfoot that decreases over time. To prevent relapse, directly after removal of the last plaster cast the child starts to wear a FOOT ABDUCTION BRACE.
Foot abduction brace is a crucial element of clubfoot treatment with the Ponseti method. The brace is used after the achieved correction, which means it is not suitable for a foot not fully corrected! The brace does not treat theclub foot, it only keeps the clubfoot in right position, preventing relapse!
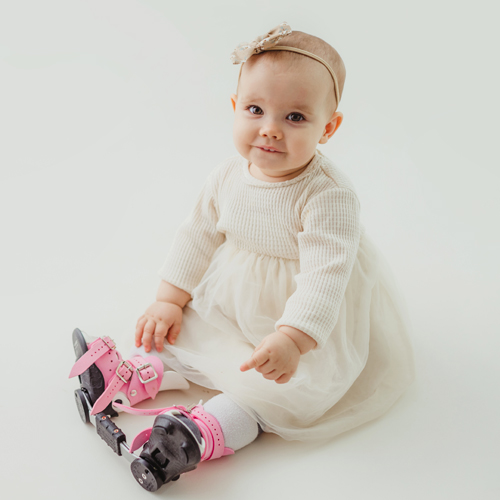
USING THE FOOT ABDUCTION BRACE BY THE CHILD IS THE MOST IMPORTANT PART OF THE TREATMENT
WHICH RELIES ONLY ON YOU!
IF YOU USE THE BRACE ACCORDING TO THE RECOMMENDATIONS AND ARE CONSEQUENT IN PUTTING IT ON,
THE TREATMENT IS 95% EFFECTIVE!
IF YOU RESIGN USING THE BRACE,
YOU CONTRIBUTE TO RELAPSE OF THE DEFECT AND ITS RE-TREATMENT,
WHICH MAY BE LONG-LASTING AND MAY INVOLVE ULTIMATE SOLUTIONS
WHICH OTHERWISE WOULD NOT NEED TO BE USED.
DESIGN
YEARS AND HOURS
When Dr Ponseti was writing his book and the Ponseti method, after many years in hiding, started to spread far and wide, making many children’s feet functional, it was stated that foot abduction brace should be used for 2 to 4 years. Recently, knowledge about clubfoot and the Ponseti method has strongly developed – more and more interesting research is conducted and scientific papers are published. The Ponseti method doctors worldwide agree that the longer the brace is worn (in years), the smaller the risk of relapse.
The knowledge advances, but some things remain unchanged, which guarantees success in treatment and reduction in number of invasive and unnecessary surgeries. Some doctors work on standardization of brace wearing time in relation to the type of the feet, to be able to state how long the brace should be used in each cas
YEARS
In some cases (atypical/complex clubfeet) even until 5th birthday or longer.
HOURS
Then, this time span is slowly reduced.
AWARNESS
FOOT ABDUCTION BRACE
SEE MORE!
SIMPLE, BUT NOT EASY…
The basic principles of the Ponseti method are simple. This simplicity allows for proper application of the method. Despite the advances in medicine, which are welcome, sometimes it is necessary to hold back and return to the sources with no modifications which result in wrong treatment.
The method itself is simple, so very many doctors fall into the trap of taking it lightly, thinking that they can do it well, that “this is not difficult at all”. However, the number of badly treated children is very high worldwide. Why?
Many unnecessary modifications are introduced to this method, which cause the original method to seem easy and trivial to many specialists. This false impression results in poor effects of treatment, sometimes even contrary to what was planned. Many doctors say that they use the Ponseti method, whereas actually this is their own method or the method that was used before the Ponseti method – a bit similar to it in the first stage of treatment. The correctness of the Ponseti method usage depends on very subtle differences and nuances, which affect the whole treatment of the child. If you take them into account during the treatment, you can see that the Ponseti method is not so simple, even though it seems to be.
(…) following the published Ponseti technique and protocol to the smallest detail greatly improves the chance of achieving the outstanding results published by many other groups.
THE PONSETI METHOD IS THE SO-CALLED “GOLD STANDARD” IN TREATMENT OF CONGENITAL CLUBFOOT.
THE AMERICAN ACADEMY OF PEDIATRICS AND WORLD HEALTH ORGANIZATION APPROVED THIS METHOD AS THE BEST TREATMENT OF THIS DEFORMITY.
SOURCES
RESEARCHES & STUDIES:
1. Ponseti IV..: “Congenital Clubfoot. Fundamentals of treatment.” (2nd edition)
2. Ponseti I.V., Smoley E.N.: “The Classic: Congenital Club Foot: The Results of Treatment.”
3. Ponseti I.V.: “To Parents of Children Born with Clubfeet.”
4. Ponseti I.V., Campos J.: “The Classic: Observations on Pathogenesis and Treatment of Congenital Clubfoot.”
5. Radler C.: “The Ponseti method for the treatment of congenital club foot: review of the current literature and treatment recommendations.”
6. Ullah S., Noor-ul Ferdous K. et al.: “Management of Congenital Talipes Equino Varus (CTEV) by Ponseti Casting Technique in Neonates: Our Experience.”
7. Morcuende J.A., Dolan L.A. et al.: “Radical Reduction in the Rate of Extensive Corrective Surgery for Clubfoot Using the Ponseti Method.”
8. Colburn M.: “Evaluation of the treatment of idiopathic clubfoot by using the Ponseti method”
9. Herzenberg J.E., Radler C. et al.: “Ponseti versus traditional methods of casting for idiopathic clubfoot.”
10. Jowett C.R., Morcuende J.A. et al.: “Management of congenital talipes equinovarus using the Ponseti method: a systematic review.”
11. Jerome T.J.: “Aberrant Tendo-Achilles Tendon in Club Foot: A case report.”
12. Scher D.M., Feldman D.S. et al.: “Predicting the need for tenotomy in the Ponseti method for correction of clubfeet.”
13. Barker S.L., Lavy C.B.D.: “Correlation of clinical and ultrasonographic findings after Achilles tenotomy in idiopathic club foot.”
14. MacNeille R., Hennrikus W. et al.: “A mini-open technique for Achilles tenotomy in infants with clubfoot.”
15. Bor N., Herzenberg J.E. et al.: “Sedation protocols for Ponseti clubfoot Achilles tenotomy”
16. Dar R.A., Bhat M.S. et al.: “Percutaneous Tendo Achilles Tenotomy in the management of Equinus Deformity in conservatively treated CTEV.”
17. Lebel E., Karasik M. et al.: “Achilles tenotomy as an office procedure: safety and efficacy as part of the Ponseti serial casting protocol for clubfoot.”
18. Parada S.A., Baird G.O. et al.: “Safety of percutaneous tendoachilles tenotomy performed under general anesthesia on infants with idiopathic clubfoot.”
19. Alves C.: “Ponseti Method: Does Age at the Beginning of Treatment Make a Difference?”
20. Liu Y.B.: „Timing for Ponseti clubfoot management: does the age matter? 90 children (131 feet) with a mean follow-up of 5 years.”
21. „Report of the 1st European consensus meeting on Ponseti clubfoot treatment.”
22. Ullah M.S. i inni: Management of Congenital Talipes Equino Varus (CTEV) by Ponseti Casting Technique in Neonates: Our Experience.”
23. Morcuende J.A., Terrazas-Lafargue G.: “Effect of Cast Removal Timing in the Coreection of Idipoathic Clubfoot by the Ponseti Method”
24. Laurent R.: “Interet de la kinesitherapie complementaire au sein de la methode de Ponseti dans le traitement du pied bot varus equin congenital.”
25. Wilcox C.: “A Healing Touch.”
PHOTOS & GRAPHICS:
1. Foot redressions: © 2009-2018 Visual Science Media All rights reserved.
2. Casting
3. Hygiene of the toes in casts
4. Cast removal
5. Shape of good casts
6. Tenotomy
7. Tenotomy model
8. Tenotomy: screenshot: “The Ponseti Method for the Treatment of Clubfoot in Distal Arthrogryposis”
10. Foot after tenotomy
11. Foot after tenotomy
12. Mitchell (Ponseti) brace
12. Other: own and supporting people of good will
13. Movie: Percutaneus tenotomy of Achilles tendon / Operateur: Dr İltifat Huseynov